Writing dApps on Emerald
This tutorial will show you how to set up dApp development environment for Emerald to be able to write and deploy dApps on Oasis Emerald. Oasis Emerald exposes an EVM-compatible interface so writing dApps isn't much different compared to the original Ethereum Network!
We will walk you through the Hardhat configuration.
Those who prefer a simpler web-only interface can also use the Remix IDE. Check out our general Remix guide. Just remember to use the Emerald networks when selecting Inject Web3 environment and connecting to MetaMask.
Oasis Consensus Layer and Emerald ParaTime
Oasis Network consists of the consensus layer and a number of Layer 2 chains called the ParaTimes (to learn more, check the Oasis Network Overview chapter). Emerald is a ParaTime which implements the Ethereum Virtual Machine (EVM).
The minimum and also expected block time in Emerald is 6 seconds. Any Emerald transaction will require at least this amount of time to be executed.
The native Oasis addresses are Bech32-encoded (e.g. oasis1qpupfu7e2n6pkezeaw0yhj8mcem8anj64ytrayne)
while Emerald supports both the Bech32-encoded and the Ethereum-compatible
hex-encoded addresses (e.g. 0x90adE3B7065fa715c7a150313877dF1d33e777D5). The
underlying algorithm for signing the transactions is Ed25519 on the Consensus
layer and both Ed25519 and ECDSA in Emerald. The Ed25519 scheme is used
mostly by the Emerald compute nodes for managing their computation rewards. For
signing your dApp-related transactions on Emerald you will probably want to use
ECDSA since this is the de facto scheme supported by Ethereum wallets and
libraries.
Finally, the ParaTimes are not allowed to directly access your tokens stored in Consensus layer addresses. You will need to deposit tokens from your consensus account to Emerald. Consult the How to transfer ROSE into Emerald ParaTime chapter to learn more.
Testnet and Mainnet
The Oasis Network currently has, similar to some other blockchains, two major public deployments: the Mainnet and the Testnet. The native tokens are called ROSE and TEST respectively. Each deployment has its own state, a different set of validators and ParaTimes. The state of the Mainnet is considered immutable for indefinite time, while the data on the Testnet can be subject to wipe in the future.
The Emerald ParaTime is deployed similarly: the Emerald Mainnet is deployed on the Oasis Mainnet Network while the Emerald Testnet on the Oasis Testnet Network. The Emerald state on the Mainnet is stable. Testnet, apart from running the unstable version of the code and being prone to bugs, can have the state deliberately wiped either on the Emerald ParaTime layer or on the Oasis Testnet Network level.
Because Testnet state can be wiped in the future, you should never deploy a production service on the Testnet!
For testing purposes, visit our Testnet faucet to obtain some TEST which you can then use on the Emerald Testnet to pay for gas fees. The faucet supports sending TEST both to your Consensus layer address or to your address inside the ParaTime.
Localnet
For development and testing, you can run a local instance of the entire Emerald stack.
Create dApp on Emerald with Hardhat
Let's begin writing our dApp with Hardhat. We will lay out a base for a modern dApp including TypeScript bindings for tests and later for the frontend application.
First, make sure you installed Node.js and that you have npm and npx
readily available. Then run:
npx hardhat init
Select the Create an advanced sample project that uses TypeScript option and
enter the root directory for your project. You can leave other options as
default. After a while Hardhat will finish downloading the dependencies and
create a simple greeter dApp.
To compile, deploy and test the smart contract of your sample project locally, move to your project directory and type:
$ npx hardhat compile
Compiling 2 files with 0.8.4
Generating typings for: 2 artifacts in dir: typechain for target: ethers-v5
Successfully generated 5 typings!
Compilation finished successfully

$ npx hardhat test
No need to generate any newer typings.


  Greeter
Deploying an Emerald Greeter with greeting: Hello, world!
Changing greeting from 'Hello, world!' to 'Hola, mundo!'
    ✓ Should return the new greeting once it's changed (613ms)


  1 passing (614ms)
Hardhat already comes with a built-in EVM which is spun up from scratch each
time we call hardhat test without parameters. It populates 20 accounts with
ETH and registers them to the ethers.js instance used in the tests.
Next, let's look at how to configure Hardhat for Emerald. For convenience, we
assign the PRIVATE_KEY environment variable a hex-encoded private key of your
Emerald wallet containing tokens to pay for gas fees. If you are running
localnet, use any of the five generated private keys.
export PRIVATE_KEY="YOUR_0x_EMERALD_PRIVATE_KEY"
Next, we configure three networks: emerald_local, emerald_testnet, and
emerald_mainnet. Open hardhat.config.ts and replace the networks field to
match the following:
networks: {
    emerald_local: {
      url: "http://localhost:8545",
      accounts:
        process.env.PRIVATE_KEY !== undefined ? [process.env.PRIVATE_KEY] : [],
    },
    emerald_testnet: {
      url: "https://testnet.emerald.oasis.io",
      accounts:
        process.env.PRIVATE_KEY !== undefined ? [process.env.PRIVATE_KEY] : [],
    },
    emerald_mainnet: {
      url: "https://emerald.oasis.io",
      accounts:
        process.env.PRIVATE_KEY !== undefined ? [process.env.PRIVATE_KEY] : [],
    },
  },
Next, we increase the default timeout for mocha tests from 20 seconds to 60
seconds. This step is not needed, if you will test your contracts solely on
localnet, but is required for Testnet to avoid timeouts. Append the
following block to the config object:
mocha: {
  timeout: 60000
}
geth --dev and ganache-cli tools use a so-called "instant mining" mode.
In this mode, a new block is mined immediately when a new transaction occurs in
the mempool. Neither Oasis Mainnet and Testnet Networks nor localnet
support such mode and the new block will always be mined at least after the 1
second block time elapsed.
Now deploy the contract to the localnet Docker container by selecting the
emerald_local network we configured above and run the tests:
$ npx hardhat run scripts/deploy.ts --network emerald_local
No need to generate any newer typings.
Greeter deployed to: 0x4e1de2f6cf4e57a8f55b4a5dd1fce770db734962

$ npx hardhat test --network emerald_local
No need to generate any newer typings.


  Greeter
    ✓ Should return the new greeting once it's changed (6017ms)


  1 passing (6s)
Next, you can try deploying the contract to the Testnet. Temporarily replace
your PRIVATE_KEY environment variable with your Testnet one and deploy the
contract by using the emerald_testnet network. Similarly, you can also
run the tests.
$ PRIVATE_KEY="0xYOUR_TESTNET_PRIVATE_KEY" npx hardhat run scripts/deploy.ts --network emerald_testnet
No need to generate any newer typings.
Greeter deployed to: 0x735df9F166a2715bCA3D3A66B119CBef95a0D129

$ PRIVATE_KEY="0xYOUR_TESTNET_PRIVATE_KEY" npx hardhat test --network emerald_testnet
No need to generate any newer typings.


  Greeter
    ✓ Should return the new greeting once it's changed (21016ms)


  1 passing (6s)
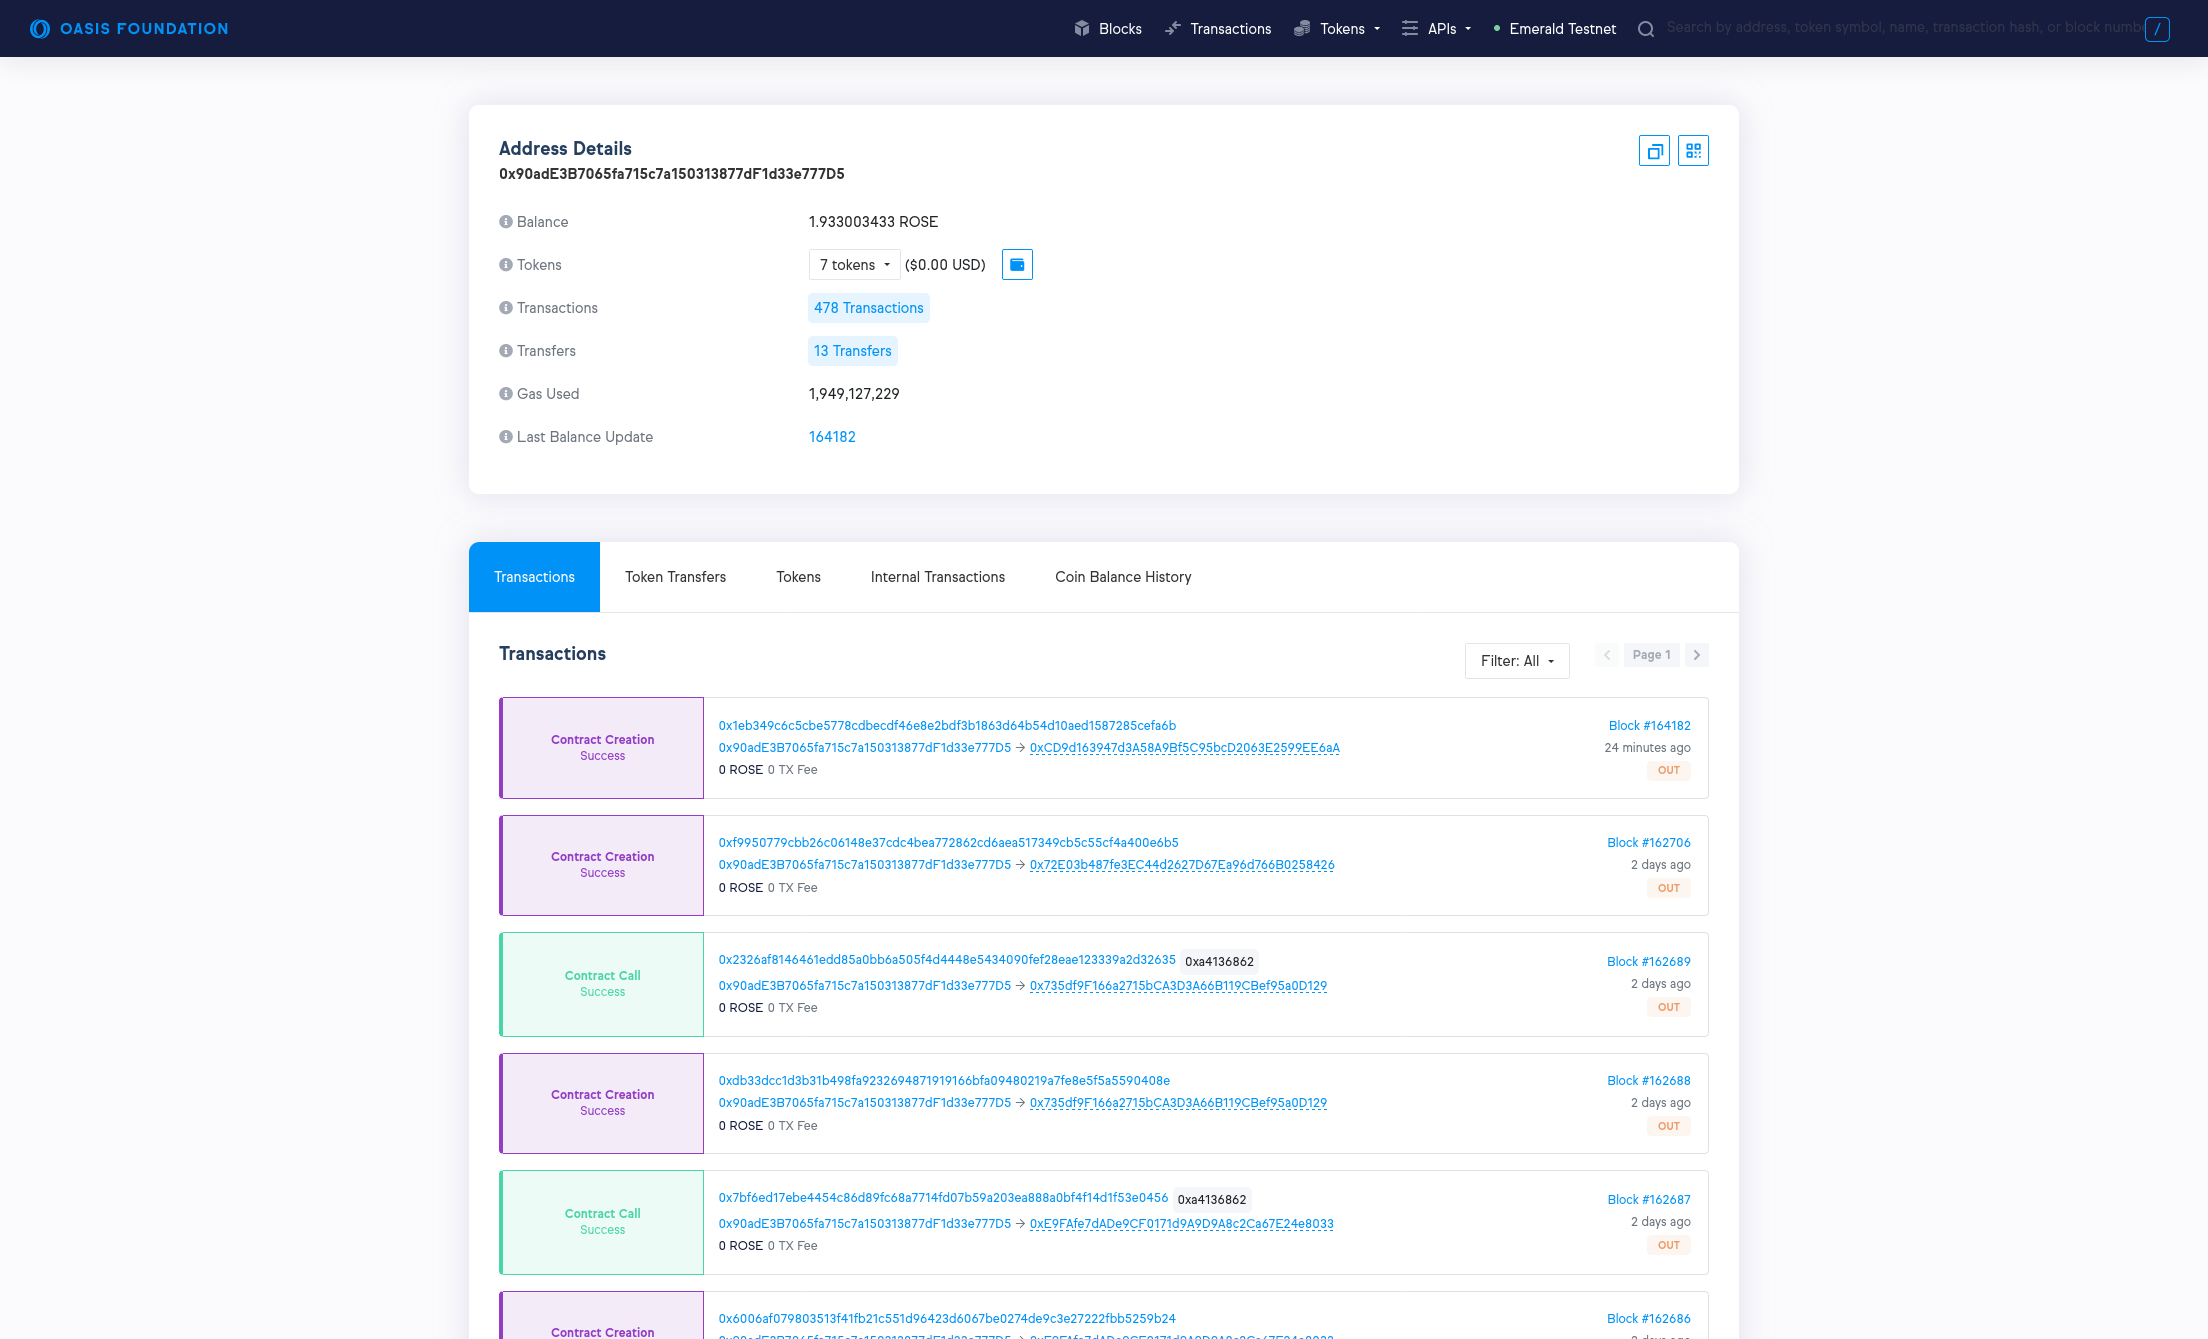
Congratulations, you have just deployed your first smart contract to the public Emerald Testnet Network! If you are unsure, whether your contract was successfully deployed, you can monitor the transactions on the Emerald block explorer (Mainnet, Testnet). This tool indexes all Emerald accounts, blocks, transactions and even offers a neat user interface for browsing ETH-specifics like the ERC20 tokens and the ERC721 NFTs.

Finally, by selecting the emerald_mainnet network and the corresponding
private key, we can deploy the contract on the Mainnet:
$ PRIVATE_KEY="0xYOUR_MAINNET_PRIVATE_KEY" npx hardhat run scripts/deploy.ts --network emerald_mainnet
No need to generate any newer typings.
Greeter deployed to: 0x6e8e9e0DBCa4EF4a65eBCBe4032e7C2a6fb7C623
Troubleshooting
Truffle Support
Per Consensys announcement, Oasis will no longer support Truffle as of 2023-10-05 and encourage immediate migration to Hardhat. Please see our repository for the archived Truffle tutorial.
Deployment of my contract timed out on Testnet or Mainnet
Emerald validators, similar to Ethereum ones, order the execution of transactions by gas price. When deploying a contract and the deployment times out, first wait another few rounds to make sure that the contract will not be deployed eventually.
Next, check that your gasPrice is at least 10 nROSE which is a minimum
required gas price on Emerald. This value should already be propagated
automatically by the web3 endpoint, but your deployment configuration might
have ignored it.
Finally, consider increasing the gasPrice parameter in the Hardhat config
file by a fraction (e.g. 10% or 20%). This will require more ROSE from your
wallet to deploy the contract, but you will also increase the chance of your
transaction being included in the block.
Execution of my contract failed. How do I debug what went wrong?
If you are using Testnet or Mainnet, try to debug your transaction by finding it on the Emerald block explorer (Mainnet, Testnet):
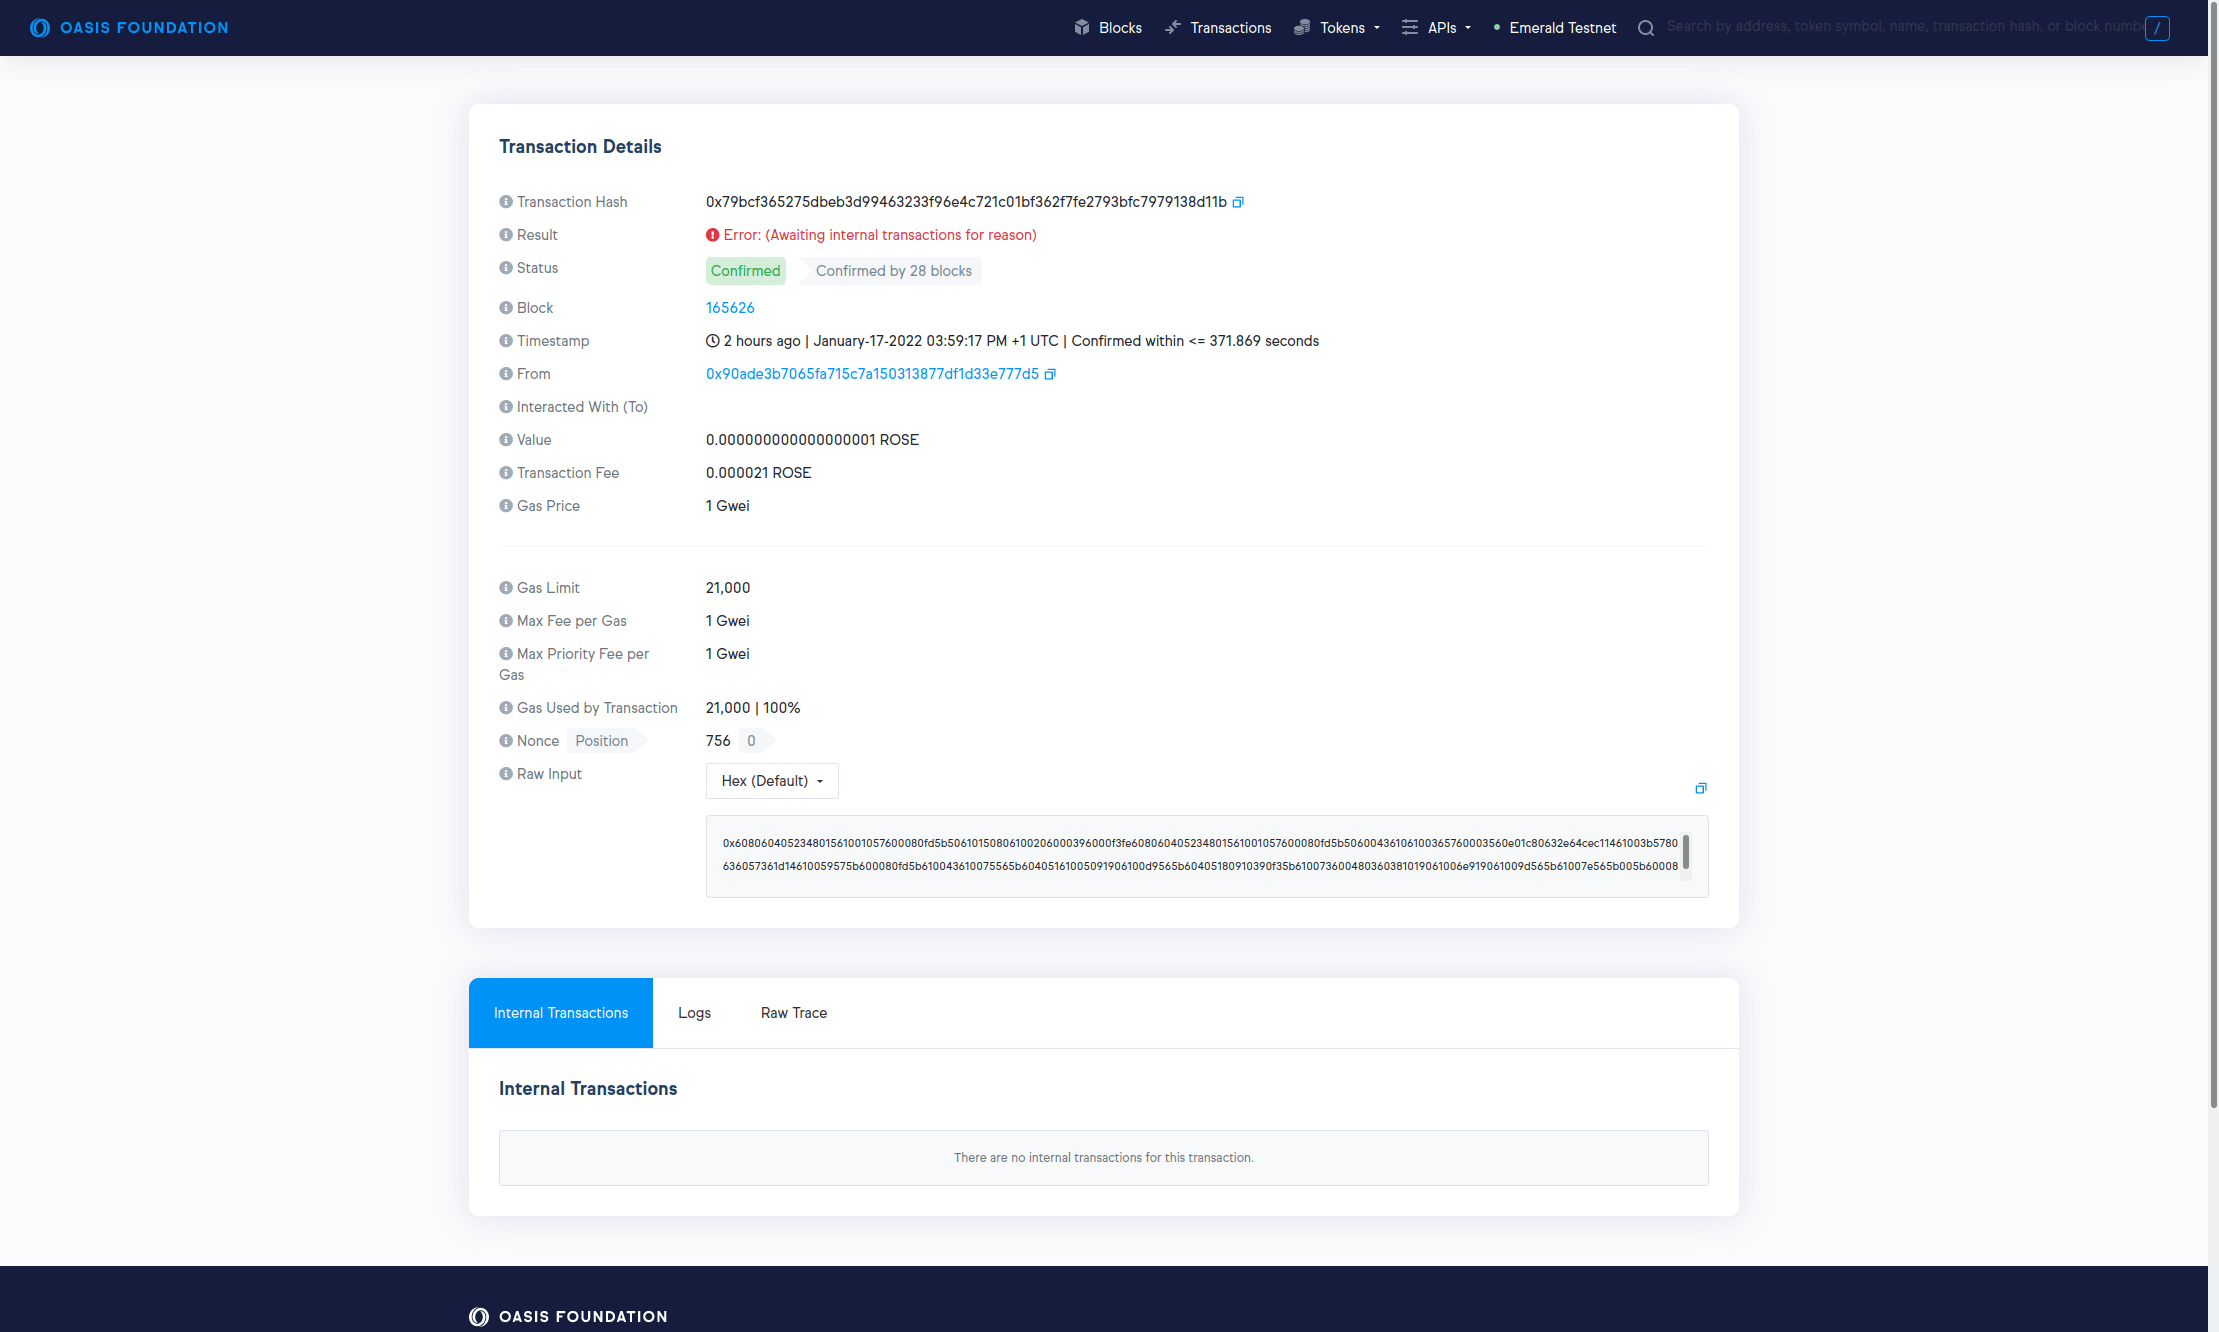
In some cases, the transaction result on Emerald block explorer might be stuck
at Error: (Awaiting internal transactions for reason). In this case or in
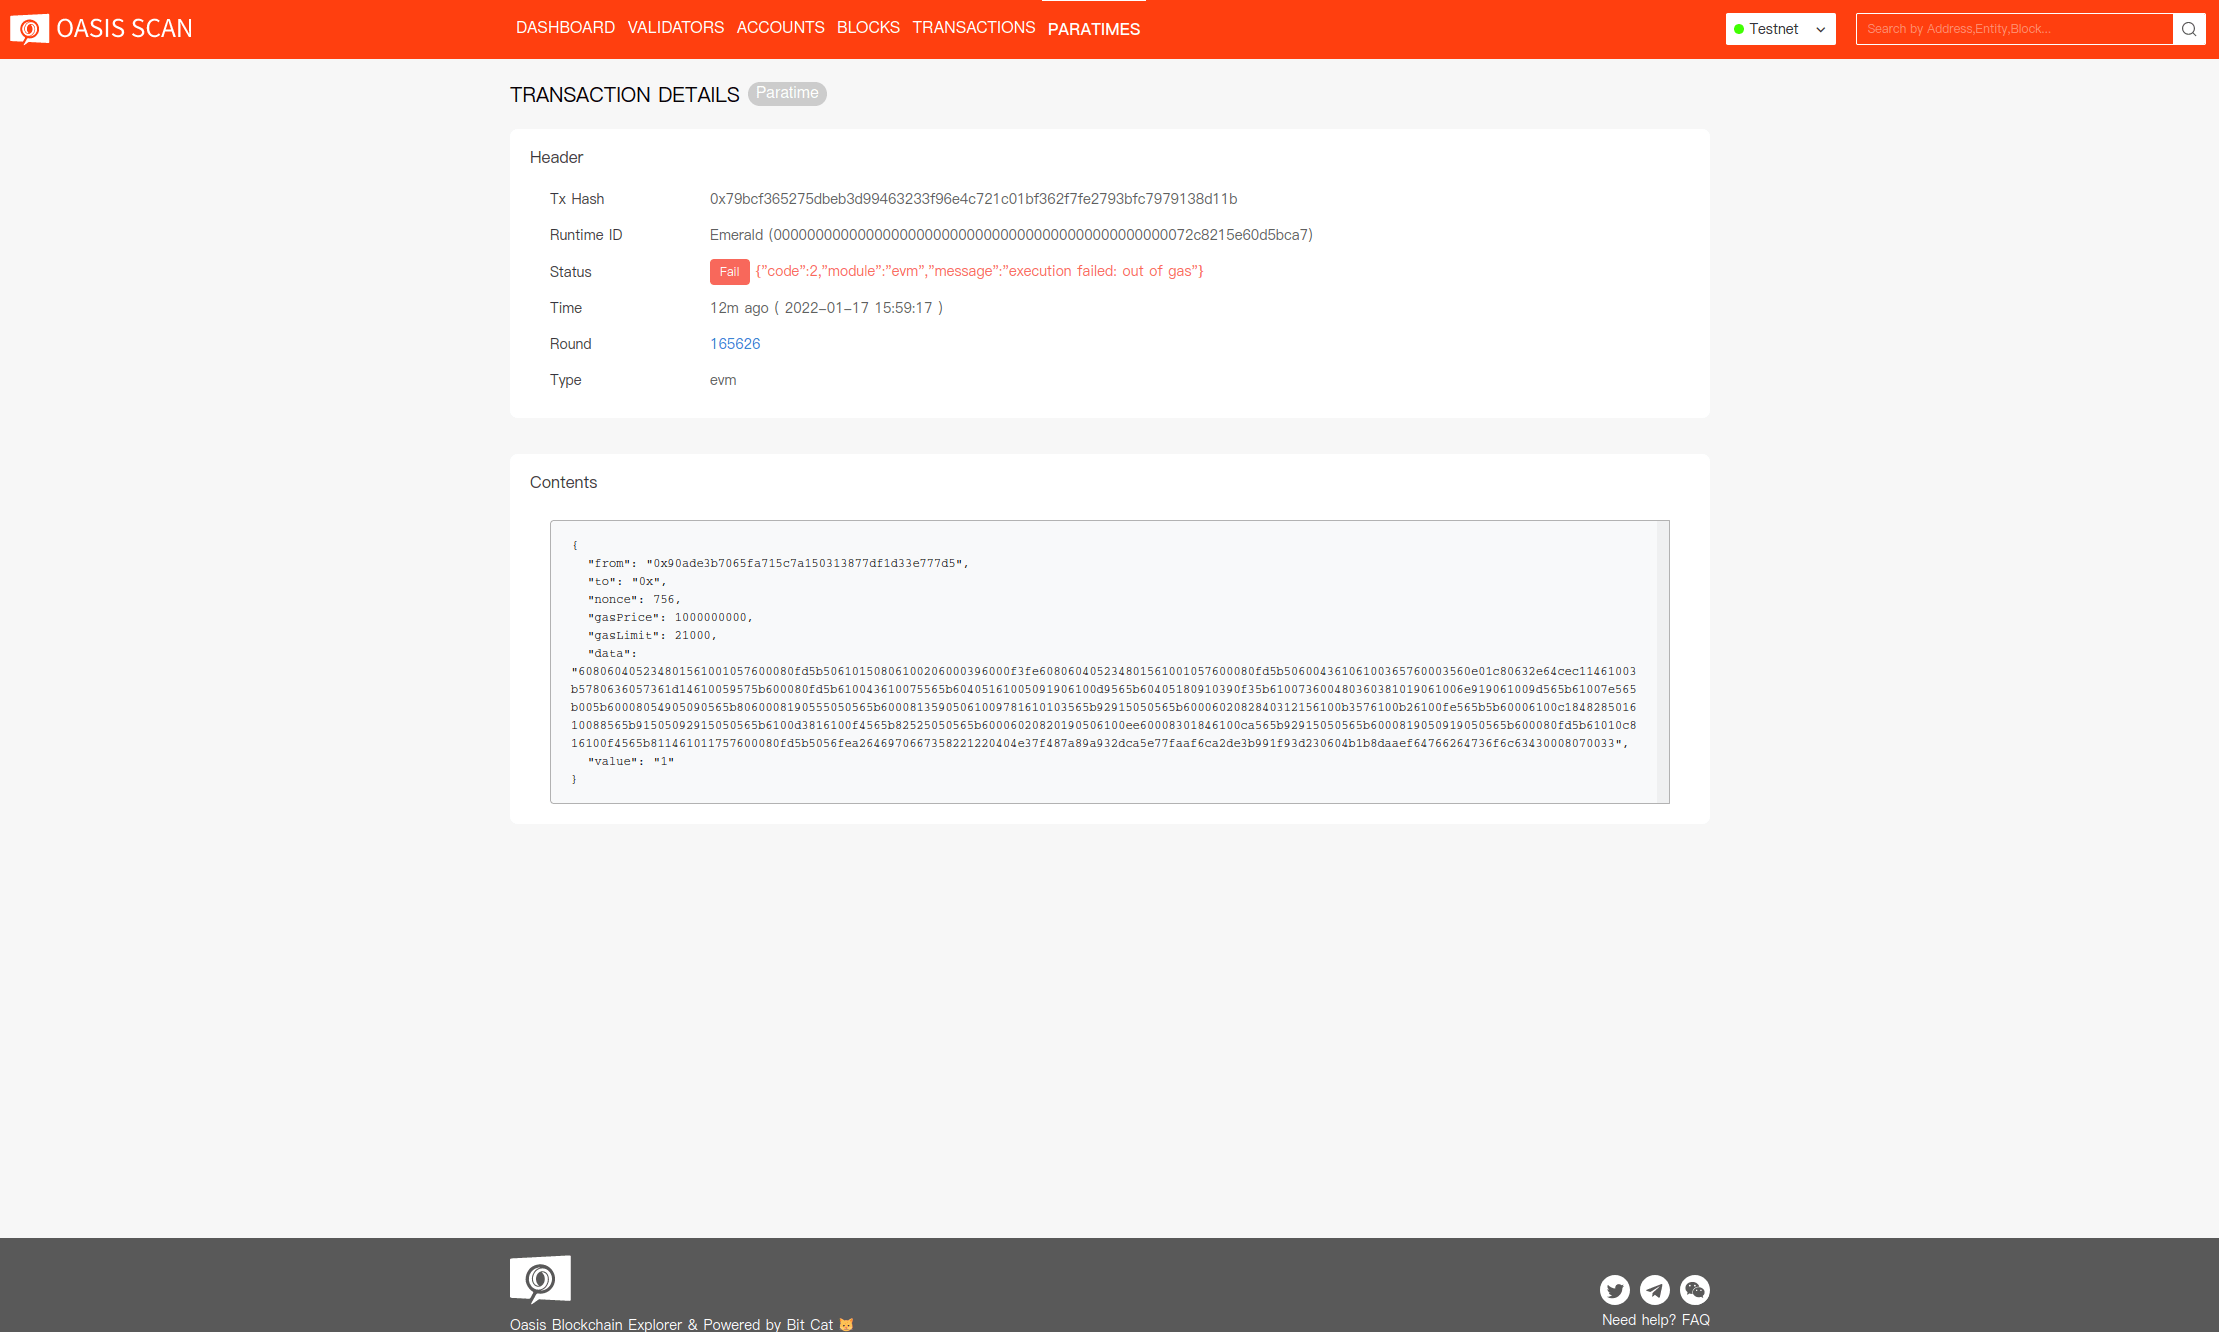
case of other Consensus layer ↔ ParaTime issues, try to find your Emerald
transaction on the Oasis Scan (Mainnet,
Testnet) which is primarily a Consensus layer explorer, but
offers some introspection into ParaTime transactions as well. Once you find your
failed Emerald transaction, the Status field should contain a more verbose
error description, for example:
See also
📄️ ParaTime Client Node
These instructions are for setting up a ParaTime client node which only observes ParaTime activity and can submit transactions. If you want to run a ParaTime node instead, see the instructions for running a ParaTime node. Similarly, if you want to run a validator or a non-validator node instead, see the instructions for running a validator node or instructions for running a non-validator node.
📄️ Web3 Gateway
Web3 gateway for Emerald and Sapphire ParaTimes